
Whee! I’ve just created and posted my first tutorial. Furthermore, by and large I achieved my vision for the look and feel. However, I didn’t fully succeed with getting under 5 minutes (it was 6 minutes 45 seconds). For future reference, here’s my journal of the process and experience.
Upgrading my lighting
Firstly, my new ring light arrived! Contrary to expectations, it was not too expensive – around US$55. The before-and-after video is here:
Unexpectedly, the light didn’t improve things right away. In fact, things initially got worse as my glasses reflected the light so my eyes became two white rings! Consequently, I had to adjust the angle and this tip on Quora helped so much!! Based on its recommendations, I cranked the light up to its highest position and angled it off to the side.
Fixing my camera focus
This has to be part of my “how-to-make-do-with-the-gear-you-have” set of tips… because even though my DSLR is outdated, a DSLR is still a very capable piece of camera equipment. So, I had no excuse for not trying to make it work. Instead of filming on “Program” mode, which I had assumed would be the easiest approach, I switched to “Aperture Priority” to get better control over the focal length. Here’s how I got the right focus while filming solo for my first tutorial:
Step 1: Set an appropriate aperture for the intended depth of field. Initially, I started with F8.0 because I thought that it would get the most amount of detail. However, F8.0 worked better for whole-body shots than for head shots, so eventually I changed to F5.6.
Step 2: Put a teddy bear (or some other soft toy) in the expected face position and pre-focus on it. To pre-focus on a DSLR, half-press the shutter button. Because it has features, it gives the camera’s autofocus a visual guide on where to expect to focus on a face.
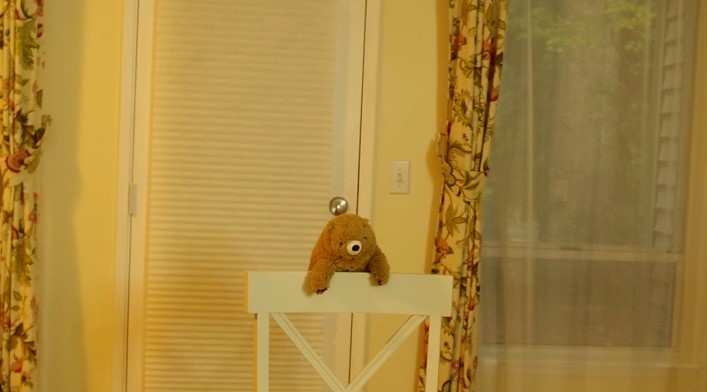
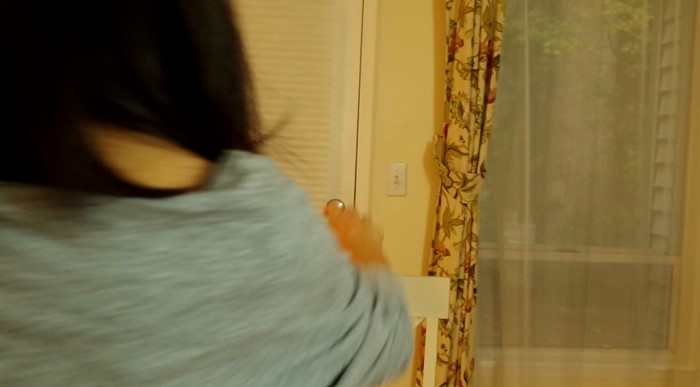
Next, I removed the teddy bear and sat down in the chair.
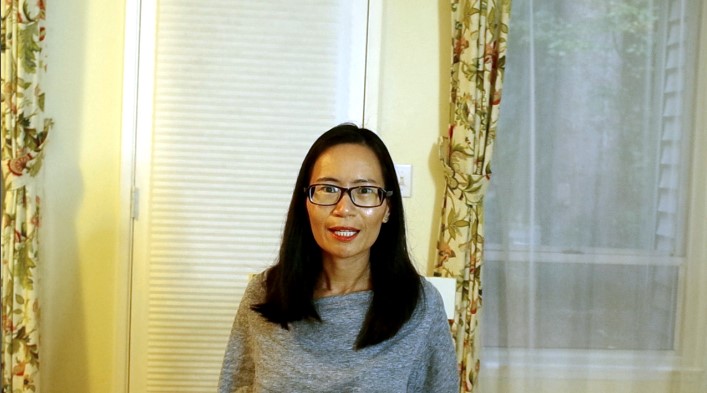
End result: I am now in focus! It took about 2 hours of trial runs to get to the point where my face was in the desired position for my talking head shots.
Voice recording on the cheap
I will use a lot of voice-overs in my tutorials, because I want to show my screen and my sewing. Although pro-style vlogging audio recorders are expensive (US$200 – $300), I didn’t need to go there to produce passable audio. Instead, I bought the cheapest lavalier microphone I could find (about US$10) and downloaded a free voice recording app on my smartphone. Conveniently, it exports the completed audio files directly to OneDrive, Google Drive, DropBox or email.
Unexpectedly, the voiceover volume is much lower than the volume from my camera microphone, so I had to put in a large gain on the voice-over clips (+30 dB) when editing my first tutorial video.
One more thing about audio that I absolutely must say: using a camera’s on-board microphone is not as dire as many experts claim it is! All the talking head shots in my 3 videos to date used my camera’s built-in mic, as it lacks an external mic input jack. Without any noise removal, the clips were still usable as-is. The only adjustments I made were a small volume gain (about +7-8 dB), and audio normalization for the tutorial video (which didn’t make much difference).
Mastering control over editing
Because editing is the newest skill in my toolkit, I took my time to continue flirting with different software. Previously, I had tried Hitfilm Express as well as VSDC. Since my computer did not work well with Hitfilm, I decided to choose a less resource-hungry alternative. After some shopping around, I found Kdenlive which is open-source and just as economical on resources as VSDC. For reference, this means that the installer file is around 70-80 MB and the file space for the program itself is 432MB for Kdenlive, and 226MB for VSDC.
After editing the same projects in Kdenlive and VSDC twice, I formed my opinions of the pros and cons of both. Again for future reference and to help others, I logged my notes into a Medium article here. Both times, I chose my VSDC output for publishing because it had the correct pre-sets to help me achieve more natural colour correction.
What I deeply appreciated about VSDC
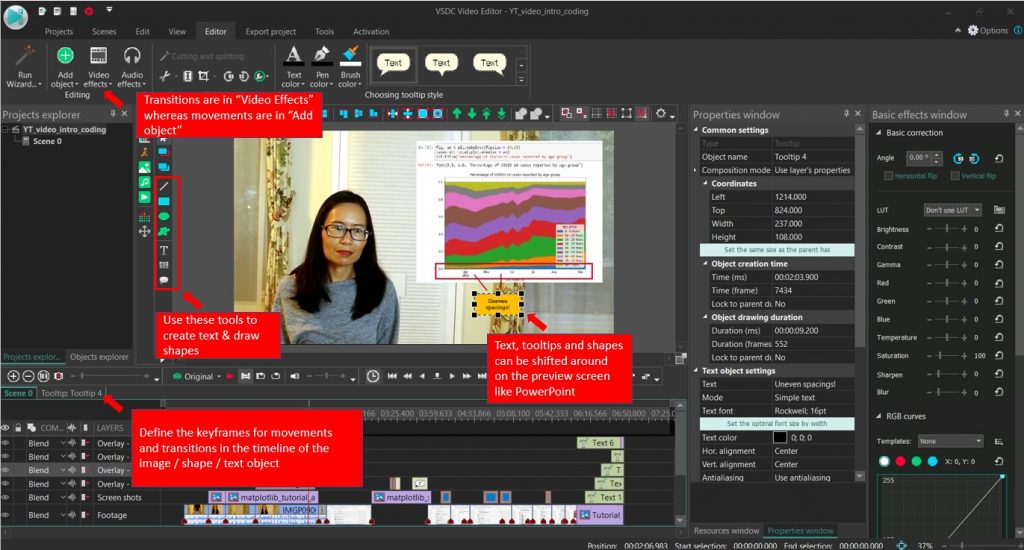
- PowerPoint-like workflow for managing animated overlays and text. Since I use a lot of PowerPoint at work, it suits my style for a first tutorial.
- Simple colour grading. I have a lot of yellow light (see the photo of the bear) and they have a colour wheel that simplifies the process of removing the yellow cast. With Kdenlive, I was trying to juggle 3 different RGB colour curves, which was frustrating. VSDC also has RGB curves with a menu of pre-sets, making it more beginner-friendly.
- Supports different text colours in the same text box. This helps with highlighting key words in animated bullet points.
What I loved about Kdenlive
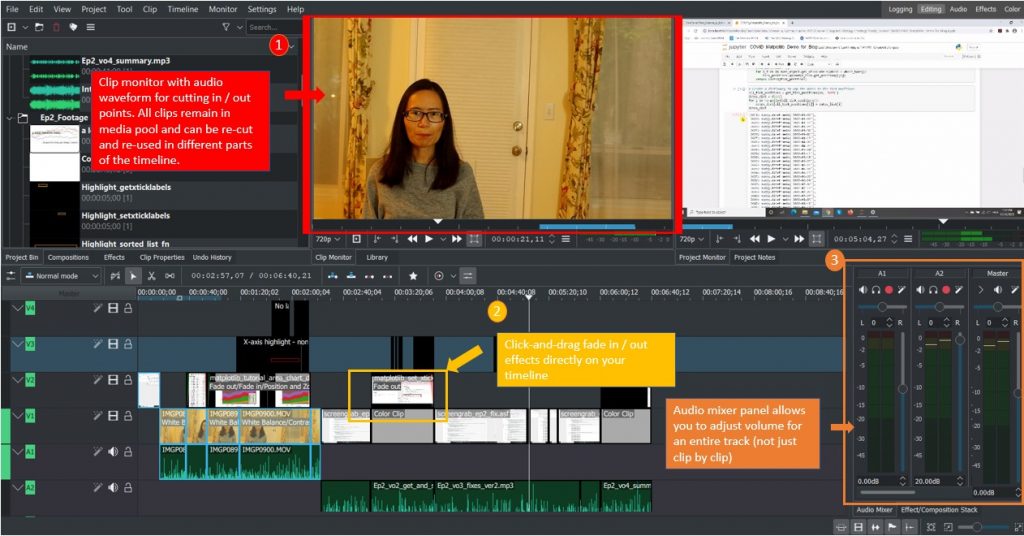
- The clip monitor is quick and responsive. When you hover over it, an audio waveform will appear which helps you to cut in sync with your script. Because Kdenlive uses proxy clips (a lower-resolution version of your footage), editing can be resource-light and quick.
- You can fade video and audio in and out just by clicking the top left or right hand corners of your clips in the timeline and dragging the point to where you want the fade to start. It’s more intuitive than VSDC, where you have to add a fade transition and then go to the clip’s timeline to adjust the timing.
- The mixer panel lets you adjust volume by track. So, if I have 3 main audio sources: audio from the camera, voice-over audio, and background music, they can go directly into 3 tracks that I then adjust in the mixer panel. There’s also a neat colour bar that tells me when my audio is maxing out.
Why I upgraded to paid software after my first tutorial
The end result of the weekend’s trial-and-error: I upgraded to VSDC Pro which is a paid subscription of US$20 per year. That translates to less than US$2 / month, so while it’s not completely free, it is still very affordable. Specifically, I upgraded to get the audio wave form and inverted masking capability, which allows me to obscure the file path of my Jupyter notebooks for privacy. This allows me to have my video editing, screen recording and voice-over all in one place.
Honestly, I felt conflicted about paying for software, when my goal was to go as far as I could with free resources. However, I appreciate the work that went into abstracting the text and image animation and colour grading processes, to the level that they enable a complete beginner like me to get presentable results with pure trial and error. Since coding and sewing are already very deep areas, I don’t have the bandwidth to develop depth in colour and film expertise as well!
Furthermore, I like how they support computers with very outdated specifications (1GB of RAM, Windows XP, and 1.5 GHz CPU). This makes video editing accessible for people in developing countries. In fact, people have posted VSDC tutorials in Hindi, Bahasa Indonesia, and Tagalog on Youtube. I felt deeply ashamed when I posted a comment on YouTube about US$2 / month being very cheap, and got contradicted by someone who said that it was not a trivial expense relative to their country’s cost of living standard.
Using GIMP for my first tutorial thumbnail
I don’t have the budget for Adobe Creative Cloud, but want to create images like the ones I see on my favourite YouTubers’ channels. (TMI: I am a fan of Coolirpa, Annika Victoria, Made by Aya, and With Wendy. They are the people from whom I get my video editing and thumbnail inspiration.) Specifically, this means that I’ll need to be able to cut out photos according to their shape outlines (fuzzy select). After some research, I found that GIMP is the closest match to Adobe Photoshop, open-source, and therefore free! Both my ring light unboxing and first tutorial thumbnail images were created with GIMP, whereas my intro video thumbnail and channel logos are from the free version of Canva. Some workflows are cumbersome (more about that in future), but it did the job.
It’s a first tutorial. Keep it short!
I really, really wanted the video to be 5 minutes or under. In fact, I read and timed my script to hit that mark. However in practice, it’s very challenging to stick to a memorized script without sounding terse and forbidding. With the extra pauses, inflections and words that made my flow more conversational, plus my 15-second intro clip, the final length was 6 minutes and 45 seconds. One area where I need to do better next time!
Performance review and conclusion
Unlike my Pandas for Productivity and Survival SQL LinkedIn and Facebook posts, this tutorial didn’t generate a lot of “likes”. I think it’s because Python is relatively specialized, so even 6 minutes of the material can be quite heavy. Furthermore, this was an intermediate topic that resonates well with me, but addresses a problem that most people might not have encountered personally. For next time, I’ll lighten and shorten the content. Stay tuned!
Is it okay if I ask you to elaborate? Could you provide an additional example? Thank you!
This is very useful! I’m happy I read your post because it’s an improvement on similar blogs I’ve read from everyone else on this subject. May I ask you to add to this? Could you provide any further example? many thanks 🙂