
Over the weekend, I finally posted my first vlog. Incidentally, this was also my first-ever attempt at video. Before getting to this point, I failed hard and fast for 5 full days. While some of the things I struggled with might seem obvious to the “digital native” generation, I had a very steep learning curve. Here is the fruit of my labour:
1. Good lighting is more important than upgrading your camera.
To begin with, my budget for maintaining this channel is essentially $0. That’s because I have decided not to do any affiliate marketing. Therefore, I need to use what I have – a five-year-old Pentax K-50 DSLR, a very basic Samsung Galaxy J7 smartphone, and a $25 tripod from Amazon Basics.
Many times, I worried that my camera would be the weak link as it doesn’t have a microphone input or a tilting LCD screen. However, it still performed better than my webcam or smartphone. Eventually, I realized that the real problem was my shady back yard. With proper lighting, I will be able to control the focus more easily. Enter one (reasonably inexpensive) investment – a basic ring light!
2. Your script is the most important piece, especially if it’s your first vlog.
Even with a mental model of my talking points, I struggled to keep my commentary tight and focused without a script. Initially, I thought that ad-libbing from broad bullet points would make me sound more natural. Instead, I rambled, stammered and took double the necessary time to convey my material. So staying organized with a tight script is crucial for your audience, your online image — and your video editing software and computer may thank you too! (More on that later.)
3. Your editing software may lag. And hang.
After compiling my first 3 or so minutes of video, my editing software started to hang. I’d play through a clip, hit the “cut” button, and nothing would happen. At the beginning, I blamed my software. After all, I was on VSDC Free Video Editor, and it’s easy to blame something that’s free. Subsequently, I downloaded Hitfilm Express, and the cutting hung on my second clip.
So, what’s the real problem here? After checking the hardware requirements of various editing software, I realized that my hardware is probably the limiting factor. I’m working on a new gaming laptop, but it is an entry-level model with an Intel Core i5 processor and 8 GB of RAM. That is more than respectable for normal purposes, but still falls short of the minimum requirement for Da Vinci Resolve, the pro-level software (miraculously free!) that is making me salivate.
The fix: I went back to VSDC, because it is the least resource-hungry of all my options. This time, I sized down my working area to only the clip that I was cutting. That meant my software did not have to worry about processing all the other parts of the video (which had 2 layers of audio and 2 layers of video), only the single clip that I was cutting. Thus, I didn’t overtax my hardware and the rest of the editing process went smoothly.
4. Be careful of how your software manages scenes / sequences.
My first YouTube upload had over 5 seconds of blank space in front, and another 5 seconds of blank space at the back. Again, I blamed my editing software. Stupidly, I assumed that the blank space was intentional buffer to make space for a Youtube intro and end screen. Therefore, I uploaded that attempt to my public channel, but deleted it eventually after fixing the problems.
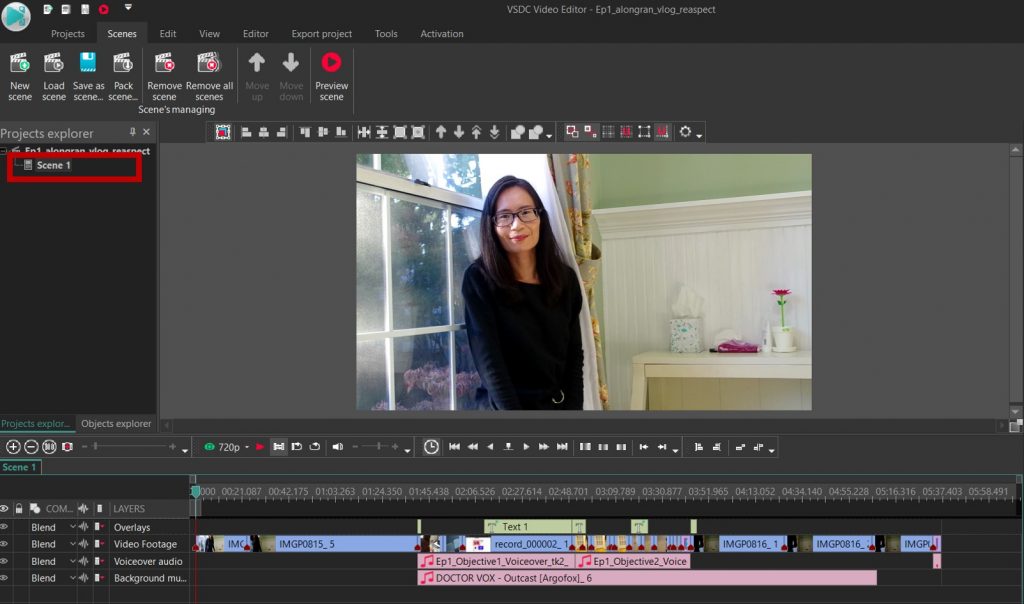
What was wrong here? Unbeknownst to me, I’d accidentally created 2 new scenes – one before and one after my work – in my editing project. The two blank scenes were causing the black space. Therefore, it’s important to get familiar with every tab and menu in your software before you export!
5. Be mindful of the resolution you export in.
Lots of online tutorials will walk you through the process of opening a new project file and remind you to choose your resolution and frame rate at that point. However, they tend to overlook that you may need to consciously choose your resolution when you export as well!
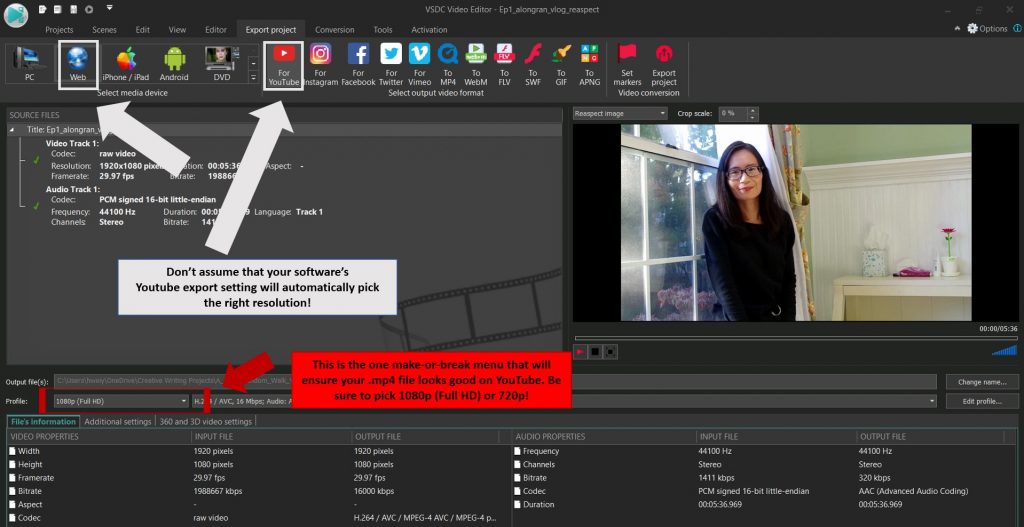
For my first three attempts, I couldn’t get rid of the black bars around my footage. At that point, I started blaming my camera – maybe it was recording in 4:3 aspect ratio? The manual verified that the Full HD option records in 16:9… but maybe there was an error? I tried creating a new project in Full HD and resizing every clip to stretch to the screen width… and still, no luck.
The eventual solution? Drum roll… My underlying footage was indeed in Full HD, but I was unknowingly exporting in 4K, because I didn’t realize I needed to change the default menu selection in my export window. At that point, I heaved a sigh of relief because my picture quality improved a lot once I wasn’t stretching the footage out to 4 times of its intended resolution.
Even after my first vlog, I might still fail fast – and fix it with what I have.
Lots of Youtube how-to videos these days are laden with affiliate advertising for sophisticated gear. Perhaps I might eventually reach a point when I feel a compelling need for an upgrade. But before getting there, I’ll have to justify it by persevering. Because your first vlog is always about improvising with makeshift gear, it’s easy and convenient to blame your equipment when you fail. But hopefully, this post will highlight that many of the problems can be fixed without upgrading anything at all. In fact I realized, often the problem was not my gear, it was me!