
When you set up Python on your computer for the first time, you also need software to write and run code. At my former employer, I used Anaconda, an open-source toolkit for Python which includes Jupyter notebooks. These allow you to write small blocks of code and run them immediately to check your work along the way. Furthermore, you can share notebooks with colleagues to re-run your analyses. Because Jupyter notebooks are popular with data scientists, your data scientists might be able to build models directly off the data you’ve cleaned and analyzed. Even non-technical colleagues will appreciate the notebooks, as they can re-run analyses quickly and follow your calculations sequentially. You can download Anaconda here for free. This post walks through the basics of Jupyter notebook setup – creating, opening and saving new notebooks.
Creating and opening Jupyter notebooks
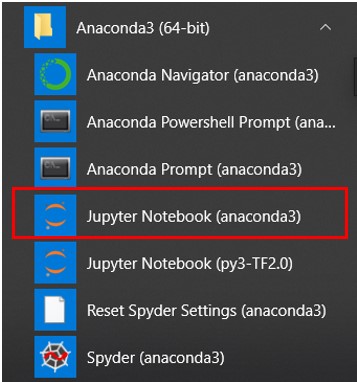
After you’ve installed Anaconda, you will see it in your Windows Start menu. “Jupyter Notebook” should be one of the items that you can select in the dropdown. (Note: I have Jupyter Notebook repeated twice here because I created a 2nd kernel to support TensorFlow, but you should have only one default kernel).
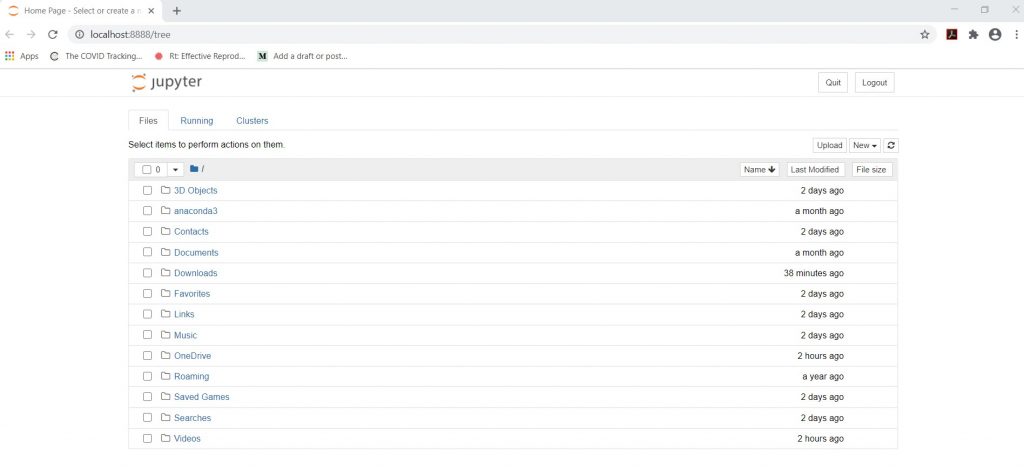
After selecting “Jupyter Notebook”, a new browser window will appear. The first page that you’ll see in your browser window will look like this:
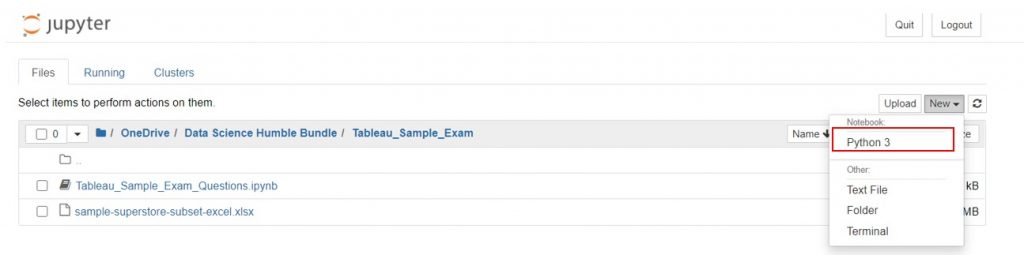
Double-click on the folder that you want to work in, and you can then start creating new notebooks. For example, I’ve gone into one of my folders which contains a Jupyter notebook and a data file for it to read. All Jupyter notebooks have a file extension .ipynb, because the Jupyter notebook used to be called the IPython notebook.
You can open an existing notebook by double-clicking on it in the dashboard. If you want a new notebook instead, go to “New” at the top right hand corner and click on “Python 3”. The new notebook will open as a new tab in your browser window.
Renaming a Jupyter notebook
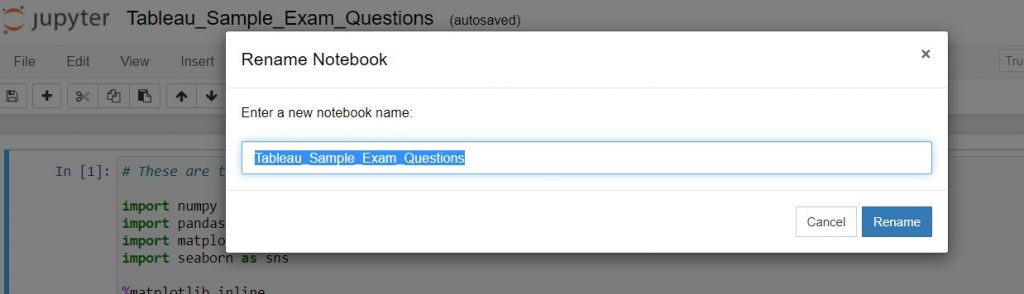
Any new notebook will have “Untitled” as its default name. However, you can rename the notebook by left-clicking on top of the notebook name. That will trigger a pop-up for you to type a new name.
Saving a Jupyter notebook
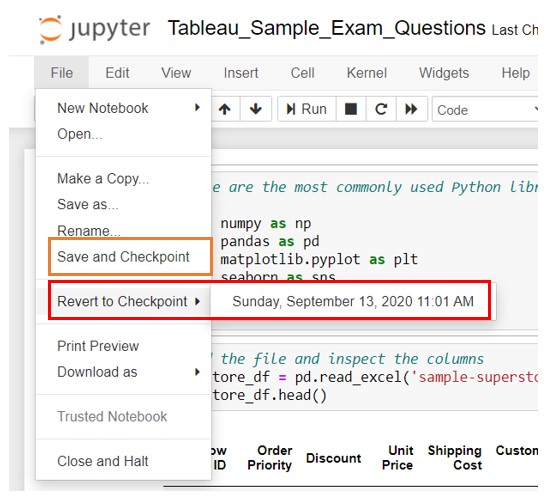
Unlike Microsoft Word and Excel, you don’t have an easy way to “undo” changes in a Jupyter notebook. Hence, you need to create checkpoints when you are satisfied with your interim work, but still experimenting with the next steps. To achieve this, go into “File” in the menu, and click “Save and Checkpoint” (see orange box below). When you need to return to the version of the notebook that existed at that checkpoint, you can click “Revert to Checkpoint”, which will open up to the date and time of the checkpoint (the red box). In other words, reverting to a checkpoint is like “undoing” everything that you had done after that checkpoint.
Finally, when you’re fully satisfied with your work, you can save the final notebook using the icon in the toolbar.
In this post, we’ve covered:
| Tasks you would do in Excel | Equivalent operation with Jupyter notebooks |
| Create and rename a new Excel workbook | Download Anaconda, then create and rename a new Jupyter notebook |
| Undo your most recent steps and save your interim and final work. | Save checkpoints and revert to those checkpoints to “undo” all changes after the checkpoint. Save your final notebook. |