Since the pandemic began, I’ve made 889 masks. Of those, 750 went to 9 institutions in 6 states, with the rest going to friends, neighbours, and family. Initially, the process was very hectic because of the severe shortage in healthcare. But thankfully, things eased by June. With donations out of the way, I could consider how to tweak the designs to be more comfortable and adjustable. Time for mask feature development!
The starting point: Olson mask pattern
Most of my donations went through the weneedmasks.org site set up by the Sewing and Craft Alliance. They requested for either of two mask types: the rectangular surgical style, and the contoured Olson mask from UnityHealth. During the process, I kept a few of the Olson masks for myself and found that they fit well, so they became the natural start point to design from.

There’s plenty to love about the Olson mask pattern:
- It’s wide enough to wrap nearly from ear to ear, providing good coverage.
- The filter pocket gives you the flexibility to insert different types of material to get better protection.
- In the base pattern, you use hair ties for ear loops. This allows some fun in colour coordination, but is less adjustable.
First phase of Olson mask feature development
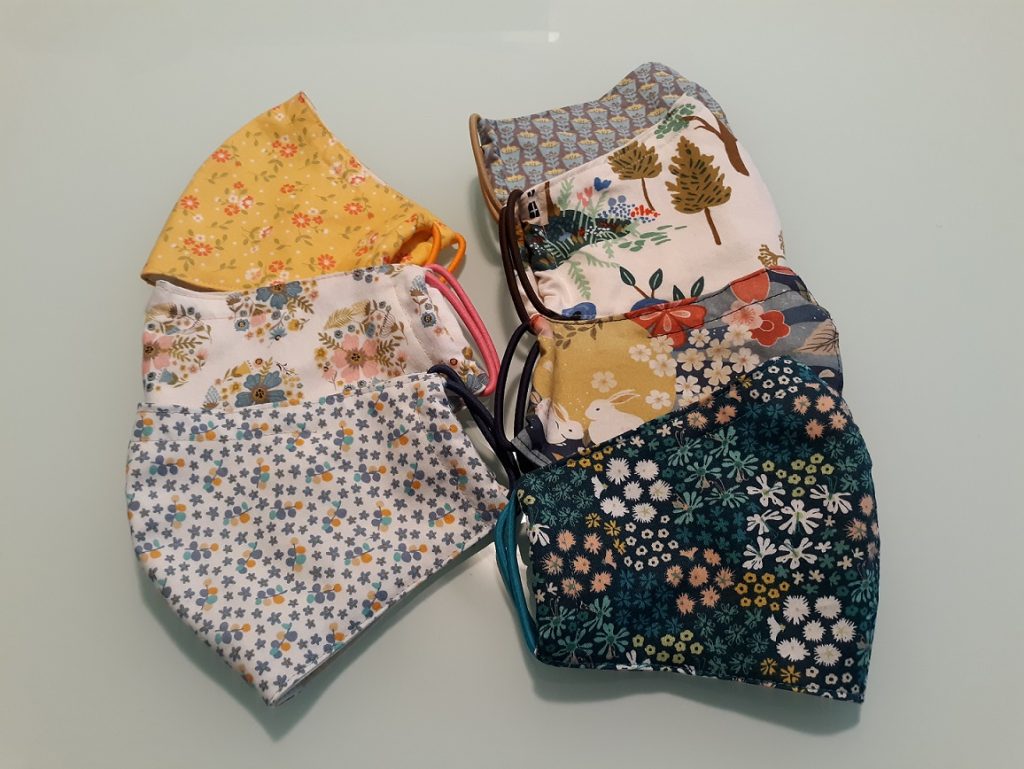
To create the pictured masks for my folks, I made a few extra tweaks to improve the fit and aesthetics:
- Top stitching down the centre seam (both sides) and along the top and bottom edges of the mask. It was fun working with matching coloured thread for interest. However, from a typical social distance the colours aren’t noticeable.
- Adding an extra seam 5/8″ from the nose edge, running up to the edges of the filter pocket, to contain a nose wire.
- Replacing the ear loop with an elastic bungee cord tightened with a toggle, as below. These are more comfortable for long periods, and are adjustable.

More patterns to fit the Asian face
Although the Olsons (thankfully) were a good fit for my family, I needed to find more options to ensure fit for Asian faces. Here are the two other patterns I tried:
- Fitted face mask pattern from the Singapore Textile and Fashion Federation, for the Masks4SG initiative
- Origami-style mask tutorial from the Made by Aya Youtube channel

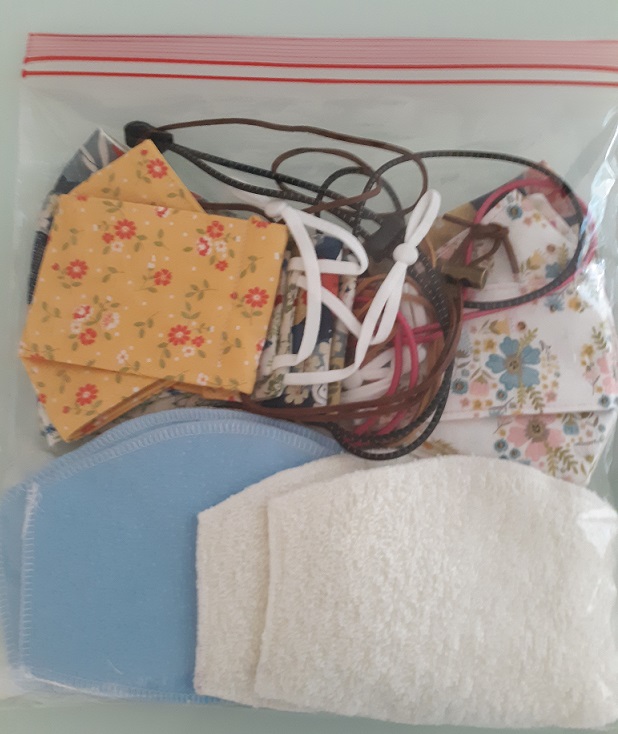
Here’s a photo of the “origami” style masks. They look pretty and are easy to sew (no curves, everything is flat) but the filter pocket is very narrow. So, the filter will only cover your nostrils and not your mouth.
Olson is a great pattern, but because everyone was so rushed with the mask shortage, the two vertical sides of the cheek piece are not completely parallel. When re-tracing the pieces on a piece of card stock, I re-drew the two lines to be parallel, so that both edges of the cheek pieces will be on grain.
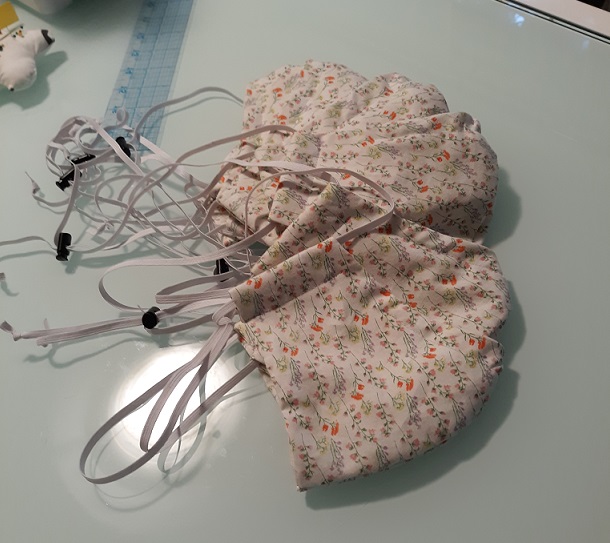
The TAFF pattern was a hit, especially with the kids sizes. Even for non-Asian families, the fit and comfort are great for the kids, combined with adjustable ear loops.
Handmade filters to improve safety
You’re probably wondering what the blue and fluffy white sheets are below the origami masks. Well, Singapore malls are large-scale indoor facilities with likely over a thousand people inside at times. And the Ministry of Health publishes daily reports on the public places visited by COVID-19 cases during their infectious period. Some of these are places that my folks could imagine themselves visiting. So, I wanted to reduce their risk as much as possible through creating filters that can outperform those currently available to the general public.
This study is not an easy read, but just looking at the table should give you sufficient information to replicate my work. The researchers blew virus-sized particles at masks made from different combinations of commonly available fabrics, and measured the filtration vs. an N95 mask. And you’ll want to use combinations where they said the transmission was either statistically lower, or similar to that of an N95 mask. That means these fabric combinations filtered out more or about the same amounts of “virus” as the N95.
Since the quilting cotton in my mask shell is the same weight as Kona cotton, I just needed the middle layers. The white version is 2 layers of terry cloth, and the blue is 2 layers of Oly-Fun (a polypropylene material that is a variant of the materials used in surgical masks) + 1 layer of flannel. To make these, I cut the shape out from the required layers and serge them together at the edges. You can trace a disposable PM 2.5 filter, or make your own by measuring the centre seam of your mask and then tapering the sides down.
The most fun part of mask feature development: experimenting with hardware!
With all the key essentials nailed, I could start looking for better options for nose wires, ear loops and toggles.
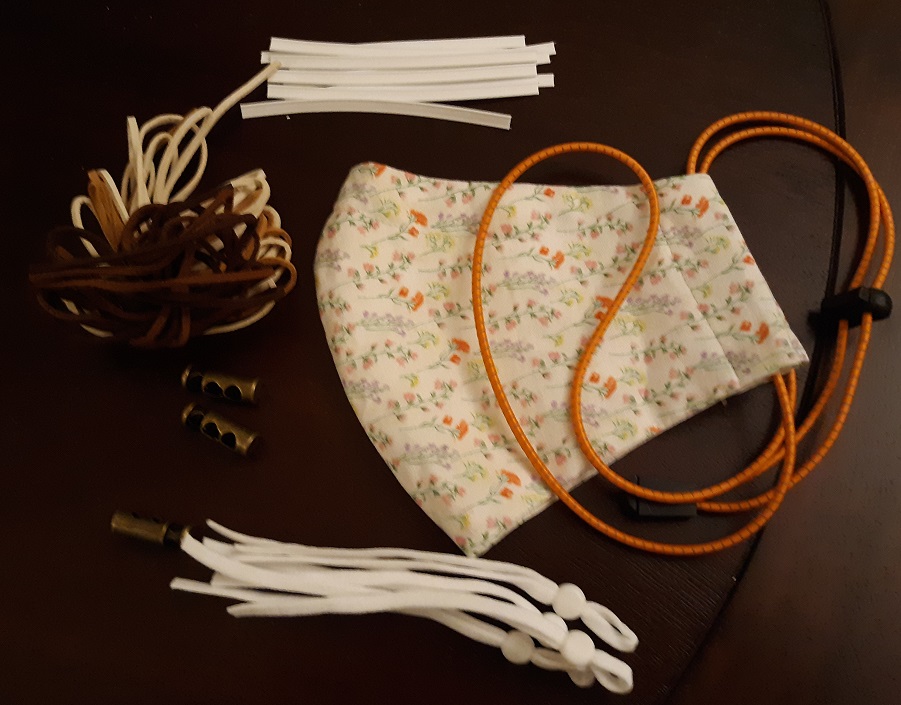
Clockwise from the top, we have:
- Nose wires, available in packs of 100: Some types have adhesive strips to stick to an N95 mask, so choose the ones without. These fit better than flower wire or pipe cleaners because they are wide (2 wires bound together) and hold their shape well. I reuse them, and am still on my first one after 3 months.
- Bungee cords with toggles: These came in packs of 20 and you need to assemble the end-cap which is very fiddly and painful. However, these are the cheapest so I ended up buying several batches of them. They are normally meant for swim goggles.
- Adjustable elastic ear loops: These are great when making masks for kids as the elastic is very soft. You need to press hard vertically on the toggle disks (made of silicone) to adjust. Again, it is a little fiddly, but it’s also a once-off operation.
- Suede ties and bronze toggles: These are for my origami masks. The side channels are too narrow for normal elastic, so I used suede cord (normally used in jewellery-making). My mum found the bronze toggles, which match very well! Thank you mum!!
Who knew that mask-making would end up being an exercise in product feature development? Hope you have fun tinkering and that these tips will help to produce more comfortable and better fitting masks!

